
We saw how to setup a streaming server with MistServer in this post, let's see how to do the same with nginx.
nginx, pronounced "engine X", is a web server that can also be used as a reverse proxy, load balancer, mail proxy, HTTP cache and, why not, RTMP server. It is free and open-source software, released under the terms of the 2-clause BSD license.
For the purpose of this trial, we will see how to install and configure the server on a Raspberry Pi board running Raspberry Pi OS Lite.
Install nginx with RTMP support
First, we must install the server and an add-on module that will allow it to handle the RTMP protocol.
sudo apt install nginx
sudo apt install libnginx-mod-rtmp
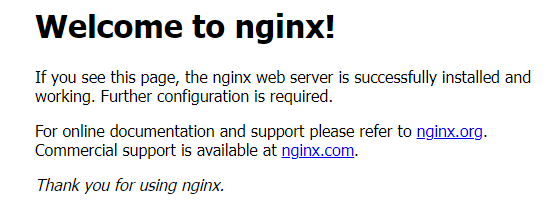
After the installation is complete, we should be able to reach the welcome page simply by entering the IP address of the server in our favorite browser, http://192.168.1.18/ for us.
Configure the RTMP server
The way nginx and its modules work is determined in the configuration file. By default, the configuration file is named nginx.conf and placed in the directory /etc/nginx. For details, please check out the Beginner’s Guide and other resources available in the nginx documentation.
To enable the RTMP protocol, edit the configuration file
sudo nano /etc/nginx/nginx.conf
then add these few lines at the very end
#               protocol   imap;
#               proxy      on;
#       }
#}
rtmp {
    server {
        listen 1935;
        application live {
            live on;
            hls on;
            hls_path /tmp/hls;
        }
    }
}
finally save the file and restart the server so that the new configuration will be loaded
sudo nginx -s reload
In this example, we are configuring the RTMP server to listen on the port 1935 (the default RTMP port), and to handle an application named live. This application has the live mode (one-to-many broadcasting) enabled. The HLS output is also enabled, the playlist and the fragments will be saved in /tmp/hls (if the directory does not exist it will be created).
The complete reference about the available RTMP directives can be found here.
Configure the HTTP server
We need to configure the HTTP server so that it can access the files in /tmp/hls for clients to play HLS. nginx uses the so called Server Blocks to serve multiple sites in parallel, let's change the configuration of the default one
sudo nano /etc/nginx/sites-enabled/default
by adding a new location entry according to the documentation
        location / {
                # First attempt to serve request as file, then
                # as directory, then fall back to displaying a 404.
                try_files $uri $uri/ =404;
        }

        location /hls {
            types {
                application/vnd.apple.mpegurl m3u8;
            }
            root /tmp;
            add_header Cache-Control no-cache;
            add_header Access-Control-Allow-Origin *;
        }

        # pass PHP scripts to FastCGI server
        #
then save the file and restart the server once again
sudo nginx -s reload
Configure the app
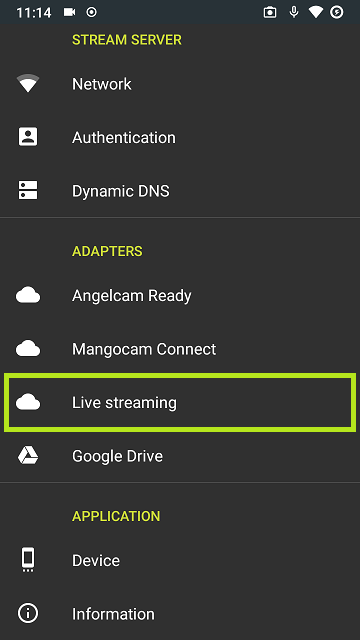
From CamON Live Streaming app settings, enable the Live streaming adapter and configure it
- in he Server field, specify the RTMP URL for the application we configured, rtmp://192.168.1.18/live in this example
- in the Stream field enter a streaming key of your choice, let's use spynet
TIP: the streaming key will be used by nginx as the base name for the HLS files

To start the stream use the arrow icon in the bottom-right corner of the main screen. By tapping on it a countdown will be shown, at the end of which the device will connect to nginx.
TIP: during the countdown, tap on the arrow again if you wish to abort


Let's see it in action
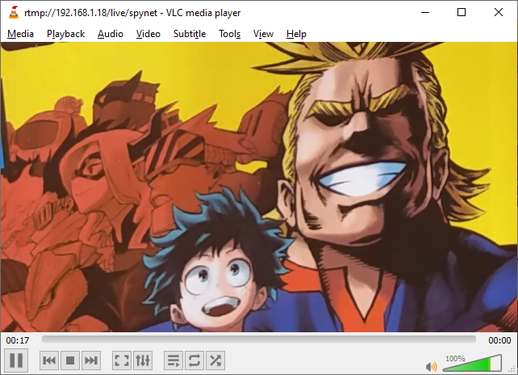
To verify that everything is working as expected, we can use VLC as the client to see the nginx broadcast.
It is possible to see the HLS output using the URL http://192.168.1.18/hls/spynet.m3u8, where hls is the location we configured for the HTTP server to find the files and spynet is the streaming key we have chosen.

It is also possible to see the RTMP output using the URL rtmp://192.168.1.18/live/spynet, where live is the name of the application we configured and spynet is the streaming key.
Embed the player
For a better user experience, we may want to embed the player in our web page, This way the broadcast will be available with no extra effort. As the player, Video.js is a good choice to see the HLS broadcast.
Let's create our index.html page in /var/www/html
sudo nano /var/www/html/index.html
with the following HTML code
TIP: the key point is to set the correct source, src="/hls/spynet.m3u8", as described above
1 2 3 4 5 6 7 8 9 10 11 12 13 14 15 16 17 18 19 20 21 22 23 24 25 26 27 28 29 30 31 32 |
<!DOCTYPE html> <html lang="en"> <head> <link href="https://vjs.zencdn.net/7.17.0/video-js.css" rel="stylesheet" /> <!-- If you'd like to support IE8 (for Video.js versions prior to v7) --> <script src="https://vjs.zencdn.net/ie8/1.1.2/videojs-ie8.min.js"></script> </head> <body> <h1>My nginx streaming server</h1> <video id="my-video" class="video-js" controls preload="auto" width="640" height="360" data-setup="{}" > <source src="/hls/spynet.m3u8" type="application/vnd.apple.mpegurl m3u8" /> <p class="vjs-no-js"> To view this video please enable JavaScript, and consider upgrading to a web browser that <a href="https://videojs.com/html5-video-support/" target="_blank"> supports HTML5 video </a> </p> </video> <script src="https://vjs.zencdn.net/7.17.0/video.js"></script> </body> </html> |
After the file has been saved (no need to restart the server), by navigating to address of the server, http://192.168.1.18/, we can see the new homepage in action

Some small tweaks
Since we are planning to broadcast our video over the Internet, we should make the server publicly reachable. To keep it simple, we should consider setting up port forwarding and the Dynamic DNS as described in this post.
In summary, if the router supports the UPnP protocol, we can use the command line utility upnpc to forward the HTTP port directly from the server. If not, we can manually configure the router.
sudo apt install miniupnpc
upnpc -a server_ip server_port external_port tcp
upnpc -a 192.168.1.18 80 8282 tcp
This way the server will be reachable from anywhere at http://public_ip_address:8282/ or http://myserver.dyndns.org:8282/.
As discussed, HLS is continuously writes files to disk while updating the playlist and the fragments. This consumes resources and can dramatically reduce the life of the SD card used by the server as storage. A better solution is to use a ramdisk to temporary store those files.
Examine the available memory to find out how much we can use.
free -h
Examine the typical HLS disk usage to find out how much memory we expect to need.
sudo du -sh /tmp/hls/
Create a folder where to mount the ramdisk.
sudo mkdir -p /mnt/ramdisk
Add an entry to fstab to configure the ramdisk (50M is enough for this example).
sudo nano /etc/fstab
proc                  /proc           proc    defaults          0       0
PARTUUID=4b551375-01  /boot           vfat    defaults          0       2
PARTUUID=4b551375-02  /               ext4    defaults,noatime  0       1
tmpfs /mnt/ramdisk tmpfs nodev,nosuid,noexec,nodiratime,size=50M 0  0
Reboot the server.
sudo reboot
Verify that the ramdisk was mounted.
sudo df -h
Filesystem      Size  Used Avail Use% Mounted on
/dev/root       3.4G  1.7G  1.6G  52% /
devtmpfs         87M     0   87M   0% /dev
tmpfs           215M     0  215M   0% /dev/shm
tmpfs            86M  632K   86M   1% /run
tmpfs           5.0M  4.0K  5.0M   1% /run/lock
tmpfs            50M     0   50M   0% /mnt/ramdisk
/dev/mmcblk0p1  253M   49M  204M  20% /boot
tmpfs            43M     0   43M   0% /run/user/1000
Change the nginx configuration so that HLS files will be saved in /mnt/ramdisk/hls instead of in /tmp/hls.
sudo nano /etc/nginx/nginx.conf
rtmp {
    server {
        listen 1935;
        application live {
            live on;
            hls on;
            hls_path /mnt/ramdisk/hls;
        }
    }
}
Change the nginx configuration so that the HTTP server will know where to find the HLS files.
sudo nano /etc/nginx/sites-enabled/default
        location /hls {
            types {
                application/vnd.apple.mpegurl m3u8;
            }
            root /mnt/ramdisk;
            add_header Cache-Control no-cache;
            add_header Access-Control-Allow-Origin *;
        }
Restart the server.
sudo nginx -s reload
Verify that the ramdisk is now used.
sudo df -h
Filesystem      Size  Used Avail Use% Mounted on
/dev/root       3.4G  1.7G  1.6G  52% /
devtmpfs         87M     0   87M   0% /dev
tmpfs           215M     0  215M   0% /dev/shm
tmpfs            86M  632K   86M   1% /run
tmpfs           5.0M  4.0K  5.0M   1% /run/lock
tmpfs            50M   12M   39M  24% /mnt/ramdisk
/dev/mmcblk0p1  253M   49M  204M  20% /boot
tmpfs            43M     0   43M   0% /run/user/1000
Your server should now run much smoother!